
Written by Harm van der Veen
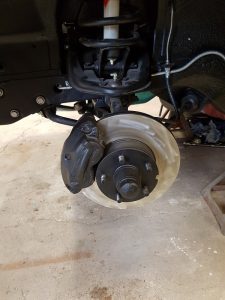
Since we last left you, the entire engine has been installed together with transmission, drive shaft and rear axle. All the brakes have been rebuilt and synthetic brake fluid used to bleed the brakes (this was a job that required two of us – Barb pumping up the brakes and me, under the car, releasing the fluid. It can be a nasty job but after so many years of doing this together, we’ve got it down to a fine science). This will avoid future issues with water in the brake lines and rusting out components. All the fluids were topped up and we readied ourselves for our first engine fire-up in 15 years! The motor was not disassembled and rebuilt as it had very few miles on it from the original rebuild Brad Hillick did. We had our fingers crossed that all the seals and gaskets would stand the test of time. Ken came over one Sunday and we started the process of bringing that big 390 back to life. My first words to Ken when he stepped in the door of the shop were “Assume nothing!”. All the fluids were rechecked, hose and electrical connections rechecked and the charger put on the battery to make sure it was up to the job. After verifying all systems “go”, we started cranking over the sleeping giant! We had trouble getting fuel from the remanufactured fuel tank to the carb so we pressurized the tank slightly with a blow gun to force fuel to the front of the car. Once we verified that we did indeed have fuel in the carb, it only took one more crank and she came to life. I was totally surprised that we didn’t see any evidence out of the tail pipe that it had sat any more than a day, let alone 15+ years! A few minor adjustments and Ken had her purring! After letting her run and come up to temperature, we shut it off and crossed our fingers on the restart which it did without missing a beat. Again, with a few more adjustments on the choke, she was as reliable as your daily driver.
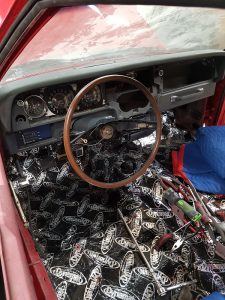
The next challenge was to get all the gauges working! We had spent hours going through the wiring harness clearing bare, twisted splices by soldering and heat shrinking them and then rewrapping the harness. However, there were still some surprises left before we could get all the gauges working. Sometimes corrosion isn’t as obvious as we think it is – it can be as simple as a minor film that stops an electrical connection being made. It took a few days to get these “gremlins” sorted out and sometimes some head scratching, but finally it got to a point where everything is working according to the shop manual specs.
Barb’s main focus was bringing back the interior from some pretty significant mold and mildew on the vinyl seats especially. She washed them with mild soap and warm water, dried them off then treated the material with leather conditioner. This treatment had to be applied a couple of times as the vinyl soaked it up quickly. There will be more of this for the front seats, sail and door panels. Again, these parts have been out of the car for many years, traipsing behind us as we moved three times!
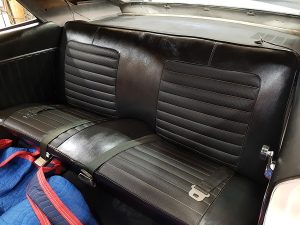
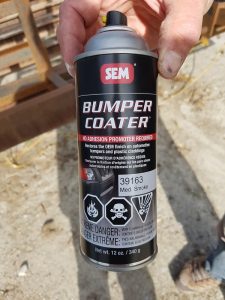
A lot of interior work has also taken place. Harm had earlier applied Dynamat to the floor of the car and rear luggage tray which will help keep the heat down when Babs is out and about in Atlanta. The carpet has now been installed together with the rear seats, seat belts and rear door pads. As the dash was rather faded, Harm picked up “Bumper Coater by SEM” which is actually a dye and painted the dash so it looks brand new. He also used the same dye to colour the steering column. This dye is very different to paint with! Although it comes in a spray bomb, it is unlike any I’ve ever used before! I found you had to “mist” the contents onto the part you are colouring. If you attempt to spray like a normal spray bomb with a nice, wet coat, you’ll find it actually creates severe orange peel. The mist coat lays down rather nicely to a smooth, even finish after you’ve walked away. But boy – is it difficult to walk away!! I found the end result to be very satisfactory and, according to my supplier, durability is excellent. He told me of one customer that I know who changed the entire colour of his interior, including the seats, and has had no issues with peeling or showing through after three years of summertime use. It’s a product I would highly recommend, but be patient when you’re applying it.
I’ve just finished painting the front spoiler, mirrors and a few other small parts of the grill assembly so once they’re installed, I can finally, finally start wet-sanding the car!
The other big challenge is the headliner. It was redone previously with a material that had a foam backing which had started to separate. Of course, it wouldn’t pull off evenly and I found that the fibre board of the headliner was also separating in spots! I did my best to clean all the loose pieces off it and thought I would be better off to have a replacement headliner, but a phone call to Kennedy’s revealed that they don’t make one for the Javelin. So, I had to go back to my less-than-perfect headliner to figure out how I was going to make it work. I decided that the best course of action was to buy up all the fibreglass resin they had in Fenelon Falls’ Canadian Tire (and then in Lindsay’s store) and soak these loose fibres with it to produce some kind of stable surface. This worked but the unfortunate part is that is was anything but smooth! So, I’ve done something I’d never done in my life – I started body working a headliner!! The challenge is not to build up too much material on it, both for weight and trying to maintain the original contour. At this point, it’s still a work in progress. We had to order a specific adhesive for high heat areas such as headliners. It’s rated for up to at least 250 degrees F and is the only adhesive the local upholstery shop would recommend.
We’re now at about 90{9bf56cdcf86fd5e484f7a6c7dd7f10c086072f0abab75d8e87856dbab1800b0f} completion on the Trans Am with plans to haul it down to Gettysburg for the AMO convention and then on to Atlanta. Ken Edwards and I will be doing that second leg of the trip together. After so many years away (almost a lifetime for her son, Marc), it will be an emotional reunion to be sure!
Editor's Note: I should also mention that some parts were heavily corroded and, as NOS replacements were not available, many had to be sandblasted and individually painted in colours as close to stock as possible. A lot of those paints were available at Canadian Tire.